As solar power becomes more affordable and efficient, homeowners are increasingly turning to solar panel systems to reduce electricity costs and promote sustainability. However, installing solar panels involves working with electrical systems, heavy equipment, and rooftops — all of which come with safety risks. That’s why a step-by-step, safety-first installation approach is essential.
In this comprehensive guide, we’ll explain how to safely install solar panels at home, from site inspection to final connection, while following the best safety practices in 2025.
Why Safety Matters in Solar Installation
Solar panel installation is more than just placing panels on your roof. It involves:
- High-voltage electrical components that can cause shock or fire if mishandled.
- Heavy lifting of glass and metal materials that could result in injury.
- Roof work that increases the risk of slips or falls.
Following a structured, safety-focused installation process helps ensure long-term system performance while protecting both homeowners and installers.
Step 1: Assess Roof Condition and Structural Safety
Inspect Before You Install
Before beginning installation, check whether your roof can support solar panels for the next 25–30 years — the average panel lifespan.
Key checks include:
- Roof age and material condition.
- Structural strength to handle panel weight (typically 15–25 kg per panel).
- Orientation and slope for maximum sunlight exposure.
- Absence of significant shading from trees, chimneys, or nearby buildings.
If your roof needs repairs or reinforcement, complete that work before installation begins.
Step 2: Plan the System Design and Layout
Choose the Right Type of Solar System
You can install one of the following:
- Grid-tied systems: Connected to the utility grid for net metering.
- Off-grid systems: Completely independent, using batteries for storage.
- Hybrid systems: Combine grid power and battery backup.
Layout Planning
Design your solar array layout using a solar mapping tool or professional consultation. Optimal placement ensures panels receive at least 5 hours of direct sunlight daily.
Make sure your inverter, battery bank, and electrical connections are located in accessible, shaded, and well-ventilated areas.
Step 3: Gather the Right Equipment and Tools
Before starting, ensure you have all necessary tools and components:
Essential Components
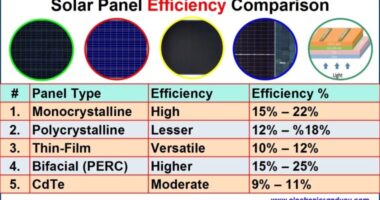
- Solar panels (monocrystalline or polycrystalline)
- Mounting brackets and rails
- Inverter (string, micro, or hybrid type)
- Charge controller (for battery systems)
- Deep-cycle batteries (optional)
- AC/DC disconnects and junction boxes
- Properly rated wiring and fuses
Tools Required
- Multimeter
- Drill and wrenches
- Safety harness and helmet
- Insulated gloves
- Ladder with stabilizers
- Voltage tester
Always use personal protective equipment (PPE) to minimize the risk of electrical shock or falls.
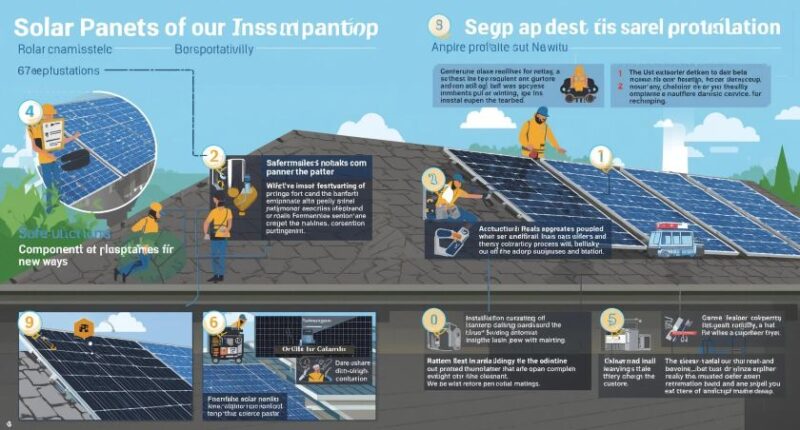
Step 4: Install Mounting Structures Safely
Roof Mount Installation
- Mark drill points on rafters using chalk or tape.
- Drill pilot holes with care to avoid water leaks.
- Secure mounting brackets firmly using lag bolts.
- Install rails or racks ensuring they are level and evenly spaced.
Safety Tip: Always attach your safety harness before stepping on the roof. Avoid installation during rain or strong winds.
Step 5: Mount the Solar Panels
Once the rails are in place, position the panels carefully.
Mounting Procedure
- Lift panels with at least two people to prevent damage.
- Align them with mounting holes.
- Tighten bolts evenly to secure panels to rails.
- Ensure tilt angles are optimized for your region’s latitude.
Electrical Safety Precautions
- Do not connect panels to the inverter until the array is complete.
- Keep positive and negative cables separate to avoid short circuits.
- Use UV-resistant cable ties for cable management.
Step 6: Wiring and Electrical Connections
Wiring is one of the most sensitive stages of solar installation. Mistakes can cause system failure, shock hazards, or fires.
Basic Wiring Sequence
- Connect panels in series (increases voltage) or parallel (increases current) as per your design.
- Route wires to a combiner box for safety.
- Connect the output to the charge controller (for off-grid or hybrid systems).
- Connect to the inverter input following manufacturer polarity guidelines.
- Connect inverter output to your main electrical service panel or battery system.
Always turn off all breakers before making connections. Use a multimeter to verify voltage before activating the system.
Step 7: Grounding and Surge Protection
Proper grounding is essential for system safety and lightning protection.
Steps to Ground the System
- Attach a grounding wire to each panel frame.
- Connect the grounding wires to a common busbar.
- Bond the busbar to a grounding rod buried at least 6 feet deep.
- Install surge protectors to safeguard electronics from power spikes.
This ensures all components remain at the same electrical potential, preventing electric shock.
Step 8: System Testing and Inspection
Pre-Activation Checklist
- Verify all wiring connections are secure.
- Check inverter input/output voltage with a multimeter.
- Ensure breakers and disconnects are properly rated.
- Confirm there are no exposed wires or loose bolts.
Once complete, switch on the inverter and observe the system’s startup process.
Professional Inspection
Even if you’re doing a DIY installation, it’s highly recommended to have a certified solar technician or local electrical inspector verify the system for compliance with local building codes and safety standards.
Step 9: Connect to the Grid or Battery Storage
If you have a grid-tied system, coordinate with your local utility company for inspection and meter installation. They’ll enable net metering, allowing you to earn credits for excess energy.
For off-grid systems, ensure your battery bank is correctly charged and balanced before connecting your loads.
Step 10: Routine Maintenance and Monitoring
Solar panels require minimal upkeep, but routine checks keep them performing efficiently.
Maintenance Tips
- Clean panels every 3–6 months with water and a soft cloth.
- Monitor performance using your inverter app or energy dashboard.
- Inspect wiring and mounts annually for corrosion or wear.
- Trim overhanging branches to prevent shading.
Regular maintenance enhances both performance and safety.
Final Thoughts: Safety Always Comes First
Solar power offers clean, renewable energy and long-term cost savings, but safety is non-negotiable. Whether you’re installing the panels yourself or hiring professionals, following this step-by-step solar installation guide ensures a safe and efficient system.
By prioritizing roof stability, proper grounding, correct wiring, and regular maintenance, homeowners can enjoy decades of reliable solar power with peace of mind.


